Standing on the roof of Africa is a life-changing dream, but a successful Mountain Kilimanjaro hike doesn’t happen by accident. Unlike technical peaks that require ropes and crampons, Kili is a massive trek of endurance, grit, and adaptability. You will journey through five distinct climate zones—from lush, humid rainforests to a freezing, windswept arctic desert at the summit. The sheer variety of weather and the thinning air mean that showing up unprepared simply isn't an option.
To give yourself the best shot at reaching Uhuru Peak, your preparation needs to focus heavily on aerobic conditioning, leg strength, and an ironclad packing strategy. It’s about building a body that can handle back-to-back days of trekking and packing a layering system that keeps you warm when temperatures plummet below freezing. By choosing the right route, training smart, and respecting the mountain's pace, you'll turn a grueling physical challenge into an unforgettable triumph.
Some of the popular Mountain Kilimanjaro hike tour packages
12-days-kilimanjaro-and-safari-in-northern-tanzania-safari-parks
10-days-best-kilimanjaro-hike-serengeti-safari-tour-and-ngorongoro-tour-combo
9-days-northern-circuit-kilimanjaro-climb-adventure
8-days-lemosho-route-kilimanjaro-climb
7-days-kilimanjaro-climb-and-hiking-safari-ascent-to-peak
6-days-best-kilimanjaro-climb-via-marangu-route
6-days-kilimanjaro-climb-via-umbwe-route
5-day-kilimanjaro-climb-marangu-route
Physical Preparation
Aerobic Fitness
Building a rock-solid aerobic foundation is your absolute secret weapon when preparing for a Mountain Kilimanjaro hike. Because you will be walking for hours on end, day after day, your body needs to become an incredibly efficient oxygen-processing machine. The best way to achieve this is by focusing on Zone 2 cardio, which is low-to-moderate intensity exercise where you can still comfortably hold a conversation. Think steady jogging, cycling, or long-distance swimming.
When you train in this zone, you are not trying to push yourself to the point of exhaustion or break any speed records. Instead, you are conditioning your heart to pump more blood per beat and training your muscles to use oxygen more effectively. This slow-and-steady approach mirrors the exact pace you will experience on the mountain, affectionately known by local guides as pole, pole (slowly, slowly). By dedicating time to consistent aerobic training months before your trip, you significantly lower your resting heart rate and build the deep stamina required to keep putting one foot in front of the other, even when the air starts getting thin.
Hiking & Inclines
While general fitness is great, nothing quite prepares you for a Mountain Kilimanjaro hike like specific, targeted leg and core conditioning. The single best way to prepare your body is to lace up your boots and head outdoors for long hikes with a weighted daypack. However, if you live in a completely flat area or do not have easy access to mountain trails, you can easily replicate the challenge at your local gym.
Utilizing a Stairmaster or setting a treadmill to a steep incline for one to two hours is an excellent substitute. To make it realistic, toss a 15–20 lb (7–9 kg) backpack on your shoulders while you do it. This might feel a bit strange at the gym, but it is incredibly effective for strengthening your calves, glutes, hamstrings, and lower back. This specific training conditions your body to bear weight while fighting gravity. It also helps break in your hiking boots and trains your shoulders to handle the weight of your daily gear, ensuring you do not suffer from avoidable aches and blisters on the actual trek.
Routine
Consistency is everything when it comes to getting your body ready for a Mountain Kilimanjaro hike. You cannot cram for a mountain; you need a structured, predictable routine that allows your body to adapt over time without breaking down. Aim to schedule your training sessions three to five times a week, ensuring you mix your aerobic days with your weighted incline days, while always leaving dedicated time for rest and recovery.
The golden rule of building this routine is the principle of gradual progression. You should only increase your overall workout intensity, distance, or duration by no more than 10% to 15% each week. Pushing too hard, too fast is a fast track to shin splints, knee pain, or chronic fatigue, which can derail your preparation entirely. By keeping your increases small and manageable, you give your joints, tendons, and muscles the time they desperately need to rebuild stronger. By the time you finally step onto the trail, this disciplined routine will have transformed your physical readiness, giving you the quiet confidence needed to stand on the summit.
2. Gear & Equipment
Do not skimp on gear; the weather changes rapidly from hot rainforests to freezing alpine zones. Renting bulky items like sleeping bags and trekking poles in Tanzania is highly recommended to save on luggage weight
Footwear
Choosing the right footwear can truly make or break your Mountain Kilimanjaro hike. You are going to be on your feet for roughly 40 to 50 miles (64 to 80 km) over incredibly varied and rugged terrain, so leaving this to chance is a recipe for disaster. You need a premium pair of high-cut, waterproof hiking boots that offer rigid ankle support to protect you from rolling an ankle on loose volcanic scree. Crucially, these boots must be thoroughly broken in at least 3 months before you depart; attempting to summit in brand-new boots is a guarantee for painful blisters.
To give you a concrete figure example, pair your boots with 2 layers of socks: a thin, moisture-wicking synthetic liner sock underneath, and a thick, heavy-duty merino wool hiking sock on top. This specific dual-layer setup drastically reduces friction. If you are trekking for 6 to 8 hours in a single day, that second layer ensures your skin isn't absorbing the rub of the boot, keeping your feet dry, blister-free, and comfortable from the humid rainforest all the way to the rocky trails.
Layering System
When packing for a Mountain Kilimanjaro hike, you have to prepare for five distinct climate zones. You will experience everything from humid 30°C (86°F) weather at the gate to bone-chilling sub-zero temperatures at the top. The golden rule here is a strict 3-layer system, and you must absolutely banish cotton from your duffel bag because it traps sweat and freezes against your skin.
- Layer 1: Start with a lightweight, synthetic or merino wool base layer (about 150 to 200 gsm) that actively pulls sweat away from your body during those steep daytime climbs.
- Layer 2: Next, add a mid-layer for insulation, such as a 200-weight fleece jacket or a lightweight packable down jacket, which traps your natural body heat.
- Layer 3: Finally, top it off with a heavy-duty, waterproof and windproof outer shell rated for at least 20,000 mm of water resistance.
This gives you the ultimate flexibility: when you get hot walking through the rainforest, you can strip down to just 1 layer; when a sudden alpine storm hits, you throw on all 3 layers to stay perfectly dry and warm.
Summit Night Gear
Summit night is a completely different beast, demanding specialized, heavy-duty winter gear. You will leave camp around midnight to push for Uhuru Peak, facing brutal conditions where wind chills can plummet to a freezing -30°C (-22°F). To survive this extreme environment, a high-loft, weather-rated down jacket with a fill power of at least 800 is an absolute non-negotiable lifesaver.
Your extremities are the most vulnerable to frostbite, so your hands require a 2-part system: a pair of thin touchscreen liner gloves inside heavy, windproof, insulated ski mittens. For your head, pack a thermal beanie and a full-coverage balaclava to protect your face from biting winds. Finally, do not overlook the intense alpine sun once dawn breaks. At nearly 19,341 feet (5,895 meters) above sea level, the atmosphere is thin and the glare off the snow is blinding. You will need Category 4 high-UV polarized sunglasses, which block out 90% or more of visible light, to protect your eyes from snow blindness during those final, exhausting hours of your Mountain Kilimanjaro hike.
Hydration
Staying hydrated is your single most effective defense against altitude sickness, but managing your water on a Mountain Kilimanjaro hike takes some careful planning. The human body burns through fluids rapidly at high elevations, so you need the capacity to carry at least 3 to 4 liters of water every single day. A great setup is to use a 3-liter hydration bladder (like a CamelBak) in your daypack for easy sipping on the trail, complemented by a sturdy 1-liter wide-mouth Nalgene bottle attached to your pack.
However, summit night presents a major challenge: temperatures drop so low that water inside thin plastic tubes freezes instantly. To prevent this, you need to equip your hydration bladder with an insulated neoprene hose cover and make sure to blow the water back into the reservoir after every single sip. Additionally, you should fill your 1-liter Nalgene bottle with boiling water right before you leave camp and flip it upside down inside an insulated bottle sleeve. Because water freezes from the top down, keeping it inverted ensures the threads of the cap won't freeze shut, leaving you with drinkable fluid when you need it most.
3. Altitude Acclimatization
Altitude sickness is the primary reason people fail to summit.
Choose a Longer Route
The primary reason trekkers fail to reach Uhuru Peak is acute mountain sickness (AMS), which makes route selection the single most critical decision of your preparation. When planning a Mountain Kilimanjaro hike, you should explicitly avoid short 5-day itineraries and instead choose a longer 7-day or 8-day route, such as the Lemosho Route or the Machame Route. These extended itineraries are specifically engineered to give your body the extra 48 to 72 hours it desperately needs to naturally acclimatize to the thinning air.
A longer timeline allows you to safely utilize the classic mountaineering rule: "climb high, sleep low." For example, on a typical 7-day Machame itinerary, you will trek during the day up to the Lava Tower sitting at an impressive 15,190 feet (4,630 meters) to stimulate your body's red blood cell production. Afterward, you will descend to sleep at Barranco Camp, which rests much lower at 13,044 feet (3,976 meters). This strategic 2,146-foot (654-meter) drop allows your respiratory system to recover overnight in thicker air, drastically increasing your ultimate summit success rate from a mere 50% on short routes to over 85% on longer paths.
The "Pole Pole" Pace
When you finally begin your Mountain Kilimanjaro hike, your professional guiding crew will constantly repeat a vital Swahili phrase: "pole, pole" (pronounced poh-lay poh-lay), which translates to "slowly, slowly." This isn't just friendly advice; it is a strict, medically necessary pacing strategy designed to keep your heart rate down and prevent your body from entering an oxygen deficit.
To put this into a practical figure example, you should be moving at a deliberate, measured pace of about 1.5 to 2 miles per hour (2.4 to 3.2 km/h), even when the terrain feels completely flat and easy. A perfect rule of thumb is the conversation test: you should always be hiking at a tempo where you can comfortably speak a full 10-word sentence to the person next to you without needing to gasp for air mid-phrase. If you find yourself breathing too heavily to chat, you are moving too fast. Conserving your physical energy during the first 5 days of the trek ensures that your muscles aren't flooded with lactic acid, leaving your body fresh and capable for the grueling, steep incline of summit night.
Hydration & Nutrition
At extreme elevations, your body works twice as hard just to keep your vital organs functioning, which completely alters your metabolic needs. As you ascend past 11,000 feet (3,352 meters), the thin, dry air forces you to breathe much faster, causing you to lose fluids through respiration at an alarming rate. To combat this hidden dehydration and keep your blood flowing efficiently, you must strictly commit to drinking between 3 to 4 liters of water every single day of your
Mountain Kilimanjaro hike.
Simultaneously, you must aggressively fuel your system, even when high altitude naturally suppresses your appetite or causes mild nausea. Your body burns up to 4,000 to 5,000 calories per day on the trail—nearly double your normal daily expenditure. Even if the mere thought of food makes you uneasy at camp, you need to force yourself to consume heavy, carbohydrate-rich meals provided by your chef, aiming for at least 300 to 400 grams of clean carbohydrates daily. Packing 3 or 4 of your favorite energy gels or high-calorie candy bars for each day can provide that quick, easily digestible fuel injection when your stomach rejects heavier food, keeping your energy tanks full for the final push.
When is the best time for Mountain Kilimanjaro hike
Timing your trek perfectly is crucial for a comfortable and successful summit. The absolute best windows for a Mountain Kilimanjaro hike are during the region's two distinct dry seasons. The primary peak season runs from January to March, offering crisp, clear mornings and cooler temperatures, with beautiful snow-capped views on the upper peaks. The second, and most popular, window spans from June to October, coinciding with the summer travel holidays. During these months, the weather is exceptionally stable, with minimal rainfall and highly predictable trail conditions across all climate zones.
While you can technically climb year-round, it is highly advisable to avoid the heavy rainy season of April and May, when downpours turn lower trails into muddy bogs and cloud cover obscures the sweeping views. By targeting the dry months, you ensure safer trekking conditions and significantly increase your chances of standing on Uhuru Peak under a clear blue sky.
Where to stay on Mountain Kilimanjaro hike
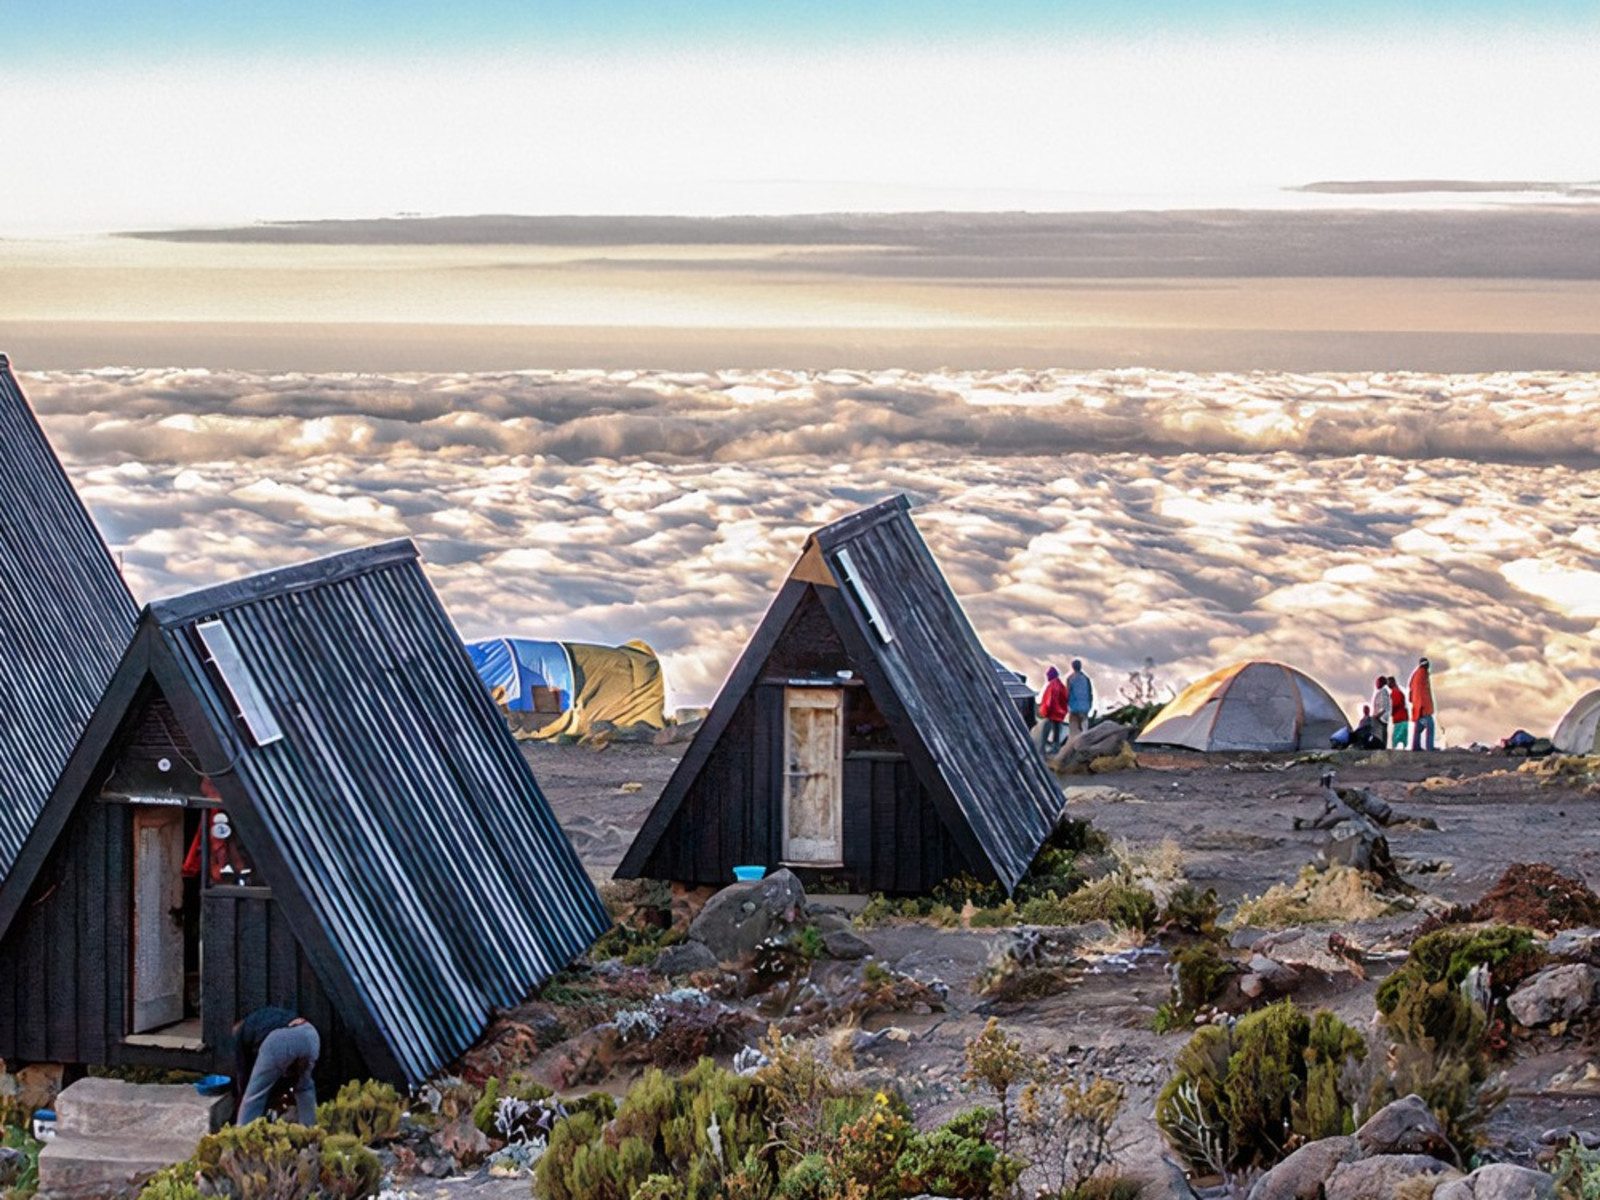
Your accommodation on the mountain depends entirely on the route you select, splitting into two distinct experiences: public rescue huts or high-altitude wilderness camping. If you choose the popular Marangu Route—often called the "Coca-Cola" route—you will stay in permanent, solar-powered wooden A-frame huts equipped with basic bunk beds, mattresses, and communal dining halls at designated camps like Mandara, Horombo, and Kibo.
For all other premium routes, including the scenic Machame and Lemosho trails, you will sleep in high-quality, four-season mountain tents pitched at designated wilderness campsites. At Roads of Adventure Safaris, we take camping comfort to the next level. We provide sturdy, weather-rated dome tents, thick, insulated sleeping mattresses, and private, portable chemical toilet tents. Additionally, a spacious, fully enclosed mess tent with proper tables and chairs is set up daily, serving as a warm, social hub where you can enjoy hot, freshly cooked meals away from the elements.
Booking Mountain Kilimanjaro hike with us Roads of Adventure safaris
Booking your ultimate trekking expedition with Roads of Adventure Safaris means partnering with an experienced, locally rooted team dedicated to your safety, comfort, and summit success. We do not believe in rushed, boilerplate itineraries; instead, we specialize in meticulously tailored 7 and 8-day routes designed to optimize your natural altitude acclimatization.
When you book with us, you are fully backed by a world-class support crew, including highly certified mountain guides trained in high-altitude medicine, professional bush chefs who prepare carbohydrate-rich meals, and dedicated porters who handle all heavy camp logistics. We supply premium safety equipment, including pulse oximeters and emergency bottled oxygen, ensuring your health is continuously monitored every step of the way. From handling your park fees and logistics to guiding you step-by-step through the changing climate zones, we transform a grueling physical challenge into a seamless, deeply rewarding, and unforgettable African adventure.