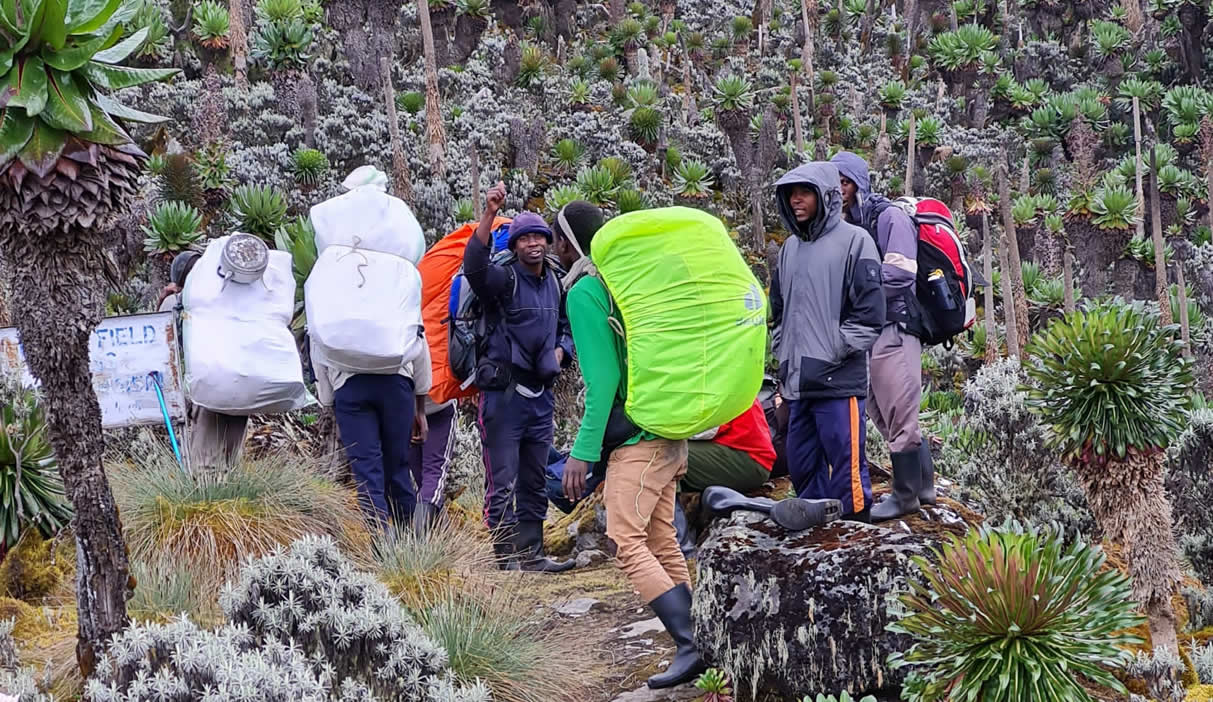
Packing for a Rwenzori hike requires technical, waterproof, and thermal gear to tackle extreme temperature shifts and notoriously muddy bogs. You will need sturdy waterproof hiking boots, a heavy fleece/down jacket, robust rain gear, a 0–10°C sleeping bag, and ankle gaiters. A Rwenzori trekking permit and yellow fever vaccination are required
15-days-rwenzori-hiking-safari-and-mountain-gorilla-trekking-vacation
11-days-best-rwenzori-mountain-hike-to-margherita-peak
7-days-mountain-rwenzori-mountain-climbing-active-adventure-to-margherita-peak
5-days-rwenzori-hike-to-either-mountain-sepeke-baker-or-luig-di-savoia
2-days-rwenzori-trek-to-nyabitaba-camp
Essential Gear
Daypack (30–40L waterproof backpack for your daily essentials)
A 30–40L waterproof daypack is designed for the hours you spend away from camp or lodges during your Rwenzori trek. It should comfortably hold your daily essentials without becoming too heavy, while also keeping your belongings protected in wet, misty conditions. Because the Rwenzori region often experiences rain, drizzle, and condensation, waterproofing is essential for preventing damage to clothing, camera equipment, water, and snacks. In a daypack you typically carry layers for changing temperatures, a rain jacket, warm mid-layer, gloves or beanie, water bottles or a hydration bladder, energy snacks, and a few personal items. You may also store items for hygiene, such as wet wipes and tissues. A key feature to look for is a secure, easy-to-access top pocket (useful for headlamps or rain covers) and durable zippers. Some trekkers prefer a pack with an internal hydration pocket or straps for trekking poles. Overall, a waterproof daypack helps you stay organized, dry, and comfortable, which is crucial for long trekking days at high altitude.
Sleeping Bag (4-season rated for 0°C to -10°C)
A 4-season sleeping bag rated for temperatures between 0°C and -10°C is important because nights on the Rwenzori can feel extremely cold, especially at higher elevations or during cooler months. Even when daytime trekking is manageable, the combination of altitude, wind, and humidity can quickly drop temperatures after dark. A properly rated sleeping bag ensures you maintain warmth during rest periods, helping you recover energy for the next day’s hike. Look for a bag with good insulation (down or high-quality synthetic fill) and an appropriate temperature rating for “survival” and “comfort.” If your bag is only rated for warmer conditions, you may struggle to sleep and wake up exhausted, which can affect your trekking performance and safety. To improve warmth without increasing weight too much, many trekkers also use a liner or a compact thermal layer inside the sleeping bag. A waterproof stuff sack or dry bag helps keep the bag dry, since damp insulation can reduce effectiveness. Ultimately, the right cold-rated sleeping bag is one of the best investments for comfort and resilience during an alpine-style trek in the Rwenzori Mountains.
Trekking Poles (Crucial for stability on steep ascents, descents, and muddy bogs)
Trekking poles provide real stability and help reduce strain on your legs, particularly in rugged mountain terrain like the Rwenzori. On steep ascents, poles help you maintain balance and reduce the load on your knees by improving your upper-body rhythm and distributing weight more evenly. On descents, poles can be even more important because they help control your footing and reduce the shock that comes with stepping down repeatedly. The Rwenzori environment often includes muddy bogs, slippery trails, and uneven ground, where maintaining traction is challenging; poles give extra points of contact and confidence while navigating around obstacles. When choosing poles, consider adjustable length and reliable locking mechanisms, since you may want to fine-tune pole height depending on whether you’re climbing or descending. Rubber tips or baskets can be useful in muddy areas to prevent poles from sinking too deeply. You can also use a pole technique—planting in advance and using a “three-point” stability approach—to help you move steadily even when visibility is poor due to clouds or rain. Overall, trekking poles improve safety, comfort, and endurance, making the hike feel more manageable across long daily distances.
Headlamp (Essential for pre-dawn summit attempts)
A headlamp is one of the most critical items for Rwenzori trekking because summit attempts often begin before sunrise. During pre-dawn starts, trails can be dark and visibility is limited, and safe movement depends on having consistent light on the path. A headlamp keeps both hands free for trekking poles, scrambling over uneven rock, or adjusting gear—something a handheld flashlight can’t do as effectively. Choose a reliable, bright model with at least a medium-to-high brightness setting for reading route conditions and navigating rocky or icy sections. Extra batteries or a rechargeable power source are strongly recommended, as cold temperatures can reduce battery performance. Many hikers also appreciate a red-light mode to preserve night vision and reduce glare among your team. Water resistance is important because the Rwenzori is known for frequent mist and rain; a headlamp that can handle damp conditions helps prevent equipment issues. A properly functioning headlamp also helps with early morning tasks such as getting dressed, preparing snacks, or locating gear in your pack. In short, a headlamp improves safety, confidence, and timing for early starts, especially during technical summit days.
Dry Bags (Use to keep clothing and electronics dry in your main duffel bag)
Dry bags are a practical way to protect gear from moisture during the Rwenzori trek, where rain, condensation, and wet ground are common. Even if you have waterproof packs, extra protection is valuable because your duffel bag can still be exposed to splashes, heavy rain, and humidity over many days. By storing clothing and electronics in separate dry bags, you reduce the risk of everything getting damp at once, which helps you stay warm and comfortable. Electronics—such as phones, cameras, power banks, and chargers—are especially vulnerable to water damage, so waterproof sealing is essential. For clothing, dry bags help keep base layers, socks, and spare garments dry, ensuring you have clean, dry items to change into when conditions are wet. Many trekkers use different dry bags for “sleeping clothes,” “backup layers,” and “electronics,” which also makes packing and locating items easier. When using dry bags, be sure to remove excess air and fully seal them according to the manufacturer instructions. Labeling the bags can save time during early morning preparations. Overall, dry bags improve reliability and comfort by keeping your most important items safe, dry, and ready throughout the trek.
Technical Climbing Gear (Crampons, climbing harness, and ice axes (only required if pushing for Margherita Peak)
Technical climbing gear such as crampons, a climbing harness, and ice axes is typically only needed if you are pushing for a more advanced ascent, like attempting Margherita Peak. For many standard trekking routes, the terrain can be challenging but does not require the same technical equipment. However, higher-elevation climbing may involve icy sections, steep snow or glacier-like surfaces, and more exposed terrain where proper tools become necessary for safety and progress. Crampons help you gain traction on snow and ice, reducing the risk of slipping. An ice axe is used for balance, controlled movement, and self-arrest in certain emergency scenarios, depending on conditions and training. A climbing harness supports secure roping in technical conditions and helps prevent falls on steep or exposed sections. It’s important to note that these items are not simply “carried for comfort”—they require familiarity and correct technique. Many expedition styles include a guide who can instruct usage, check fit, and assess whether conditions truly warrant technical gear. Carrying unnecessary gear can also increase weight and fatigue, so it’s best to bring technical climbing equipment only when the route plan and conditions indicate it’s needed. When used correctly, this equipment significantly improves safety and allows climbers to tackle more demanding summit terrain.
Clothing & Layers (Avoid Cotton)
Base layers (Moisture-wicking long underwear and long-sleeved synthetic or merino wool shirts)
Base layers are your first line of defense against cold, wet weather, and sweat buildup. On the Rwenzori, temperatures can change quickly during the day—warm when trekking and cold during rests—while mist and rain can leave clothing damp. Moisture-wicking long underwear helps pull sweat away from your skin so you stay drier and warmer, reducing the risk of chills. Long-sleeved shirts made from synthetic fabrics or merino wool add insulation while still allowing breathability. Merino wool is especially useful because it provides warmth even when slightly damp and helps reduce odor during long trips. A good base layer should fit snugly but not restrict movement, and it should dry relatively fast. It’s also important to choose materials that resist mildew and retain comfort after repeated exposure to moisture. Many trekkers bring one set to wear and an additional set to change into at night or when conditions are extremely wet. The comfort and dryness you maintain in the base layer directly influence your energy levels, overall warmth, and ability to enjoy the trek safely.
Mid layers (Fleece jacket or lightweight down jacket)
Mid layers provide the insulation you need between your base layer and outer shell, especially when temperatures drop during early mornings, late evenings, and cloud-covered ridge sections. A fleece jacket is a versatile choice because it is breathable, dries relatively quickly, and retains warmth even if it becomes slightly damp. Lightweight down jackets are excellent for colder periods and camp use, offering strong warmth-to-weight performance. The key is layering effectively: you should be able to add or remove the mid layer as your body heats up during climbs or cools down during breaks. If the weather is wet, fleece can be more forgiving because it continues to insulate even when damp, while down works best when kept dry—though many modern jackets include water-resistant coatings. For the Rwenzori, where wind and altitude-related cooling can be significant, carrying a mid-layer helps prevent “cold fatigue,” when you start shivering and feel less comfortable on the trail. Choose a mid-layer that allows freedom of movement and can be packed easily. This layer often makes the difference between a restful camp and an uncomfortable, sleepless night.
Outerwear (Waterproof and windproof shell jacket and trousers)
Outerwear is essential for the Rwenzori Mountains because rain, mist, and strong winds are common, and wet conditions can quickly lead to uncomfortable chilling. A waterproof and windproof shell jacket and trousers act as a barrier that blocks water while also reducing wind chill, helping you stay warm and focused while trekking. The jacket should have a good hood, adjustable cuffs, and ventilation options if you tend to overheat during climbs. Trousers are especially important if the trail includes muddy bogs, stream crossings, or sections where grass and rocks shed water onto your legs. Waterproofing quality matters—look for a durable, reliable fabric and sealed seams to prevent water from entering through stitching. Windproof shells also help in exposed ridge areas where temperatures can feel much colder than expected. Well-designed outerwear should allow movement for trekking and scrambling without restricting your stride. Keeping these garments dry and ready is crucial; many trekkers keep them in easily accessible parts of their backpack. With proper outerwear, you can continue safely and comfortably even during prolonged rain or cold winds.
Headwear (Wide-brimmed sun hat, plus a warm wool hat/balaclava that covers your ears)
Headwear is one of the most important pieces of clothing because your body loses heat through your head, and you also need protection from sun and weather. A wide-brimmed sun hat helps shield your face, neck, and ears from direct sunlight during long daytime hikes, especially in clearer moments when UV exposure can feel strong at altitude. It also provides shade for better comfort while walking under bright conditions. In contrast, a warm wool hat or balaclava is designed for cold mornings, windy ridges, and nighttime temperatures. The balaclava version that covers your ears can be especially valuable on the Rwenzori because ear pain and intense cold are common during early starts and summit attempts. Choosing wool is helpful because it retains warmth, manages moisture better than many synthetic alternatives, and feels comfortable against the skin. A practical approach is to bring both sun and cold headwear so you can adjust throughout the day. For example, you can use the sun hat during warmer periods and switch to the wool hat when you stop for extended breaks. Together, these pieces help regulate temperature, prevent sunburn, and keep you comfortable and safer in changing alpine conditions.
Hands: (Thin inner glove liners and heavy, waterproof outer gloves)
Gloves are crucial for maintaining hand comfort in cold, wet mountain environments. Thin inner glove liners provide flexibility and help with moisture management by keeping sweat off your skin. They also add a small layer of insulation without restricting dexterity, which is important for handling zippers, adjusting straps, using a camera, or working with trekking gear. Over the liners, heavy waterproof outer gloves protect against rain, wind, and wet trail conditions. In the Rwenzori, mornings and high-elevation sections can feel sharply colder, and wet gloves quickly become uncomfortable and unsafe because you may lose grip. Waterproof outer gloves help preserve warmth and ensure your hands remain functional even in light drizzle or muddy crossings. The “layering” approach—liners plus waterproof gloves—lets you fine-tune warmth. When the weather is mild, you can use liners alone; when conditions turn cold or wet, you combine both layers for stronger protection. When selecting gloves, prioritize a secure fit and durable material, and ensure they work well with your trekking poles. Testing your finger dexterity before departure can also help—if you can’t comfortably operate buckles and zippers, you may struggle in camp and on the trail.
Footwear (Broken-in waterproof hiking boots, several pairs of thermal hiking socks, and comfortable camp shoes (sneakers or sandals))
Footwear planning can make or break a trek because wet terrain, long days of walking, and frequent elevation changes put heavy pressure on your feet. Broken-in waterproof hiking boots are essential to prevent blisters and discomfort. “Broken-in” means you’ve worn them enough to soften the materials and align the fit with your foot shape, reducing the risk of rubbing during long treks. Waterproofing helps keep feet dry when crossing muddy areas and walking through misty or rainy sections, but boots must still allow breathability so your feet don’t become overly hot and sweaty. Bring several pairs of thermal hiking socks to rotate and keep feet warm. Rotating socks is especially useful when some pairs get damp, enabling you to change into dry warmth for recovery and better sleep at camp. Thermal socks also provide cushioning and insulation in colder early-morning conditions. For camp, comfortable footwear is equally important. Sneakers or sandals allow your feet to relax and dry out while reducing the pressure from boots. This combination—supportive boots for the trail, thermal sock rotation, and comfy camp shoes—helps prevent foot problems, supports endurance, and keeps you comfortable throughout the Rwenzori experience.
Health, Safety & Personal Care
Health, Safety & Personal Care (First Aid Kit)
A well-packed first aid kit can make the difference between a minor issue and a lost day. Include altitude sickness medication if your route goes to higher elevations, along with painkillers for headaches, muscle aches, and minor injuries. Blister plasters are essential for long climbs where friction builds up fast, and Imodium can help if stomach upset strikes during demanding trail conditions. Throat lozenges are useful for dry, cold air at altitude or irritation from wind exposure. Rehydration salts are a must-have for heat exhaustion, diarrhea, or any time you’re losing fluids and need electrolytes to recover properly. Keep these items accessible—ideally in an easy-to-reach pouch—so you’re not fumbling when you need them most. Check expiration dates before departure and ensure you understand how any medicines should be used. If you have allergies or specific medical needs, pack personal medications and consider carrying a basic emergency contact note.
Sun Protection
High-elevation sun can be intense even when temperatures are cool, so sun protection should be treated as a survival item, not an optional extra. Bring high-SPF sunscreen to prevent painful sunburn and reduce the risk of longer-term skin damage, especially if snow or exposed rock increases glare. Choose a formula you’re comfortable using repeatedly, and apply it to face, ears, and neck—areas hikers often miss during quick stops. Pair sunscreen with 100% UV-blocking polarized sunglasses to protect your eyes from both ultraviolet radiation and harsh reflections from bright terrain. Polarization also helps reduce glare, improving visibility on steep sections, rocky paths, or near snowfields. Consider reapplying sunscreen during prolonged breaks, after heavy sweating, or whenever you’ve wiped off your face. Wear a hat or buff if possible for extra coverage, but still use sunscreen because UV can reach skin from multiple angles. Keep sunglasses in a protective case to avoid scratches from packing and scrambling.
Toiletries
Toiletries for high camps should prioritize hygiene, comfort, and low impact. Wet wipes are extremely helpful when shower facilities aren’t available, especially after long travel days or when you’ve been sweating in cold, dusty conditions. Choose wipes designed for sensitive skin if possible, and remember to pack out trash—never leave waste behind. Bring a travel towel to dry off and for basic personal comfort during cold mornings when washing isn’t always feasible. A biodegradable soap is useful for quick, minimal washing at stops where water is limited. Use it sparingly to protect fragile environments, and follow local guidance about waste disposal. If you’re carrying a headlamp, you may also want toiletry items that work in low light, such as a small mirror or lotion. Keep toiletries in a dedicated bag to avoid contamination of your main supplies, and ensure they’re accessible when you stop for rest. A tidy kit makes camp routines smoother, helps you feel refreshed, and reduces the risk of skin irritation during multi-day hikes.
Hydration
Staying properly hydrated is one of the most important factors in maintaining energy, temperature regulation, and overall hiking performance. Carry reusable water bottles so you can refill instead of relying on single-use plastic. In addition, bring water purification tablets because even if mountain streams look clean, water can still contain microorganisms that cause GI illness. Purification is strongly recommended for safety, especially on multi-day trips where you may need to refill repeatedly. Plan your water capacity based on hike length, expected weather, and availability of safe sources. Drink regularly rather than waiting until you feel thirsty—thirst can arrive too late when conditions are dry or you’re at altitude. Consider using a schedule, like small sips at each break, and larger amounts when you reach a reliable source. If you notice dizziness, headaches, dark urine, or cramps, act quickly: prioritize fluids and electrolytes. Rehydration salts (from your first aid kit) can support recovery when hydration issues are linked to diarrhea, heat, or heavy exertion.
Energy Snacks
Energy snacks help you stay steady between meals, especially on long ascents where hunger, low blood sugar, and fatigue can creep in gradually. Pack high-calorie trail mix for quick, satisfying fuel that’s easy to eat while moving. Include glucose packs for rapid energy during steep climbs, when you feel shaky, lightheaded, or slowed down by exertion. For longer stretches, protein and energy bars provide a more sustained source of calories and help reduce the “crash” that can happen after fast carbs. Choose lightweight options that don’t crush easily and are easy to open with gloves if you’re hiking in colder conditions. Portion your snacks so you’re eating consistently rather than waiting until you’re starving—small, frequent intake often performs better than big bites. Keep snacks accessible in your outer pocket or top compartment so you can grab them without unpacking your whole bag. Staying fueled improves mood, decision-making, and reaction time, all of which matter when the terrain gets technical or weather changes quickly.
Requirements & Logistics
Permit: Required and arranged through local licensed operators
Permits are required to enter and trek in the Rwenzori region, and they’re typically arranged through local, licensed operators. Working with a reputable company helps ensure your access is properly authorized and that your itinerary matches the requirements set by park and national authorities. Using an established operator also reduces the risk of delays caused by incomplete paperwork, missing dates, or incorrect group information. In many cases, a licensed operator will handle the permit submission process, coordinate route approvals, and confirm whether your trek type (guided walk, camping itinerary, or more technical climb) requires additional permissions. It’s especially important to book in advance, because permits may be limited during peak seasons or based on route conditions. Before traveling, confirm exactly what your permit covers—entry dates, group size limits, and whether there are any mandatory guidelines for guides, carrying rules, or camping zones. Always keep a copy of your permit details (and digital backup) accessible during the trek, since officials may request verification at key checkpoints.
Vaccinations (Yellow Fever certificate is mandatory)
Vaccinations are a key part of traveling safely into Uganda, particularly because public health rules may be enforced at entry points. A valid Yellow Fever vaccination certificate is mandatory to enter Uganda. This requirement helps protect both travelers and local communities, and it’s one you should prepare well before your departure date. Make sure you receive the vaccine from an authorized provider and obtain the official certificate—avoid relying on verbal confirmation or informal receipts, as only the proper documentation is accepted. Check the certificate’s validity period and whether it meets the entry rules for your travel dates; some certificates are only considered fully valid after a specific time window following vaccination. If you’re traveling as part of a group, ensure everyone has their own certificate. Consider also additional routine vaccines (and region-specific recommendations) such as hepatitis, typhoid, and tetanus boosters, depending on your health status and itinerary. Bring your certificate with you throughout the trip, and keep a photo copy as backup. Consult a travel clinic early so you can plan vaccinations confidently and avoid last-minute delays.
Porters (Required and strongly advised for heavy gear)
Porters are an important part of most Rwenzori treks, and in many cases, you are required (and strongly advised) to hire one to carry heavy gear. The terrain in the mountains can be demanding—steep slopes, rough paths, and long daily distances increase the physical load on trekkers. Using a porter helps you conserve energy, maintain steadier pacing, and reduce fatigue-related mistakes that can become dangerous in bad weather or low visibility. Porters typically carry items like larger camping equipment, extra food, or heavier personal gear, while you focus on manageable loads and safe movement. Beyond safety and comfort, hiring porters also supports local livelihoods and fosters better teamwork within the trek group. When selecting a porter, confirm responsibilities clearly: what they’ll carry, how loads will be redistributed, and how gear access works during the day. Ensure that porter arrangements follow operator guidelines, including fair payment and appropriate rest breaks, and always respect local regulations regarding porter conduct and carrying limits. Bring gear in organized sacks or duffels so it’s easy to distribute and keep dry.
Equipment hires (Tents, rucksacks, and climbing gear at headquarters)
If you don’t already have the necessary technical equipment or camping supplies, you may be able to hire items at the park headquarters through local services such as Rwenzori Mountaineering Services. Equipment hire is especially helpful if you’re traveling without bulky gear or you want to avoid high costs of renting from distant companies before departure. Common hire items may include tents, rucksacks, and essential climbing or trekking gear—depending on your route and the trek type (non-technical walk vs. technical sections). Using an equipment hire service also improves compatibility: gear is usually maintained for the local conditions and matched to what guides and porters expect for safe operations in cold, wet, and high-altitude environments. Before confirming rentals, check the exact items included, sizes/weights available, and whether any items require deposits or specific return procedures. Inspect the condition of key gear like boots, harnesses, ropes, and weather protection if that’s part of your rental package, and ask how to handle repairs or replacements if something fails. Keep receipts or rental confirmations, and plan for possible delays if certain sizes sell out. Hiring locally can streamline your preparation and help you focus on the trek itself rather than logistics.
Best time for a Mountain Rwenzori hike
The best time to hike the Rwenzori Mountains is typically during the drier seasons, when trails are safer and visibility is better. Most trekking operators recommend aiming for periods when rainfall is lower and temperatures are more stable, because heavy rain can make paths slippery, increase river hazards, and reduce mountain views. The Rwenzori can still be wet even in “dry” periods, so expect clouds, mist, and sudden showers. Plan for flexible weather and bring proper waterproofs, since conditions can change quickly at altitude. If you prefer calmer conditions and clearer panoramas, choose dates that align with the local peak travel windows offered by trusted operators, as they often schedule routes around weather patterns and ranger guidance. For the most accurate advice on timing for your exact route (Camps/entry point), ask your operator to suggest the best window based on recent trail conditions.
Where to stay on a Mountain Rwenzori hike
Where you stay on the Rwenzori depends on your trek style. Most hikes use a camping itinerary, meaning you’ll sleep in tents at designated camps along the route. Camps are usually managed as part of your guided trek, with rangers and support staff coordinating the nightly setup and meal arrangements. You may also stay in lodges or hotels before the trek (e.g., near the trailhead/park headquarters) so you can rest, attend briefings, and prepare gear. After the hike, many travelers spend another night at a nearby property for recovery, showering (if available), and settling logistics. Your operator can help with campsite planning, transport from pickup points, and confirmation of what’s included (tents, sleeping arrangements, and any dining provisions). Always ask about toilet facilities, charging availability (if any), and how weather affects comfort at high camps.
Booking a Mountain Rwenzori hike with Roads of Adventure Safaris
Booking with Roads of Adventure Safaris can simplify the entire Rwenzori experience—from selecting your route and dates to organizing the support needed for safe trekking. A reputable operator will typically handle key logistics like permit processing, guiding, porter arrangements, and the overall itinerary so you don’t have to piece everything together yourself. They’ll also help you match your experience level to the right trek plan, whether you’re looking for a guided camping hike or a more challenging route. By booking through a professional team, you can reduce the risk of delays caused by missing documentation or unavailable gear, and you’ll get clearer communication on what to pack and what’s provided. If you have questions about vaccinations, equipment, or pacing, using a trusted safari company ensures you get practical, trip-specific answers before departure.