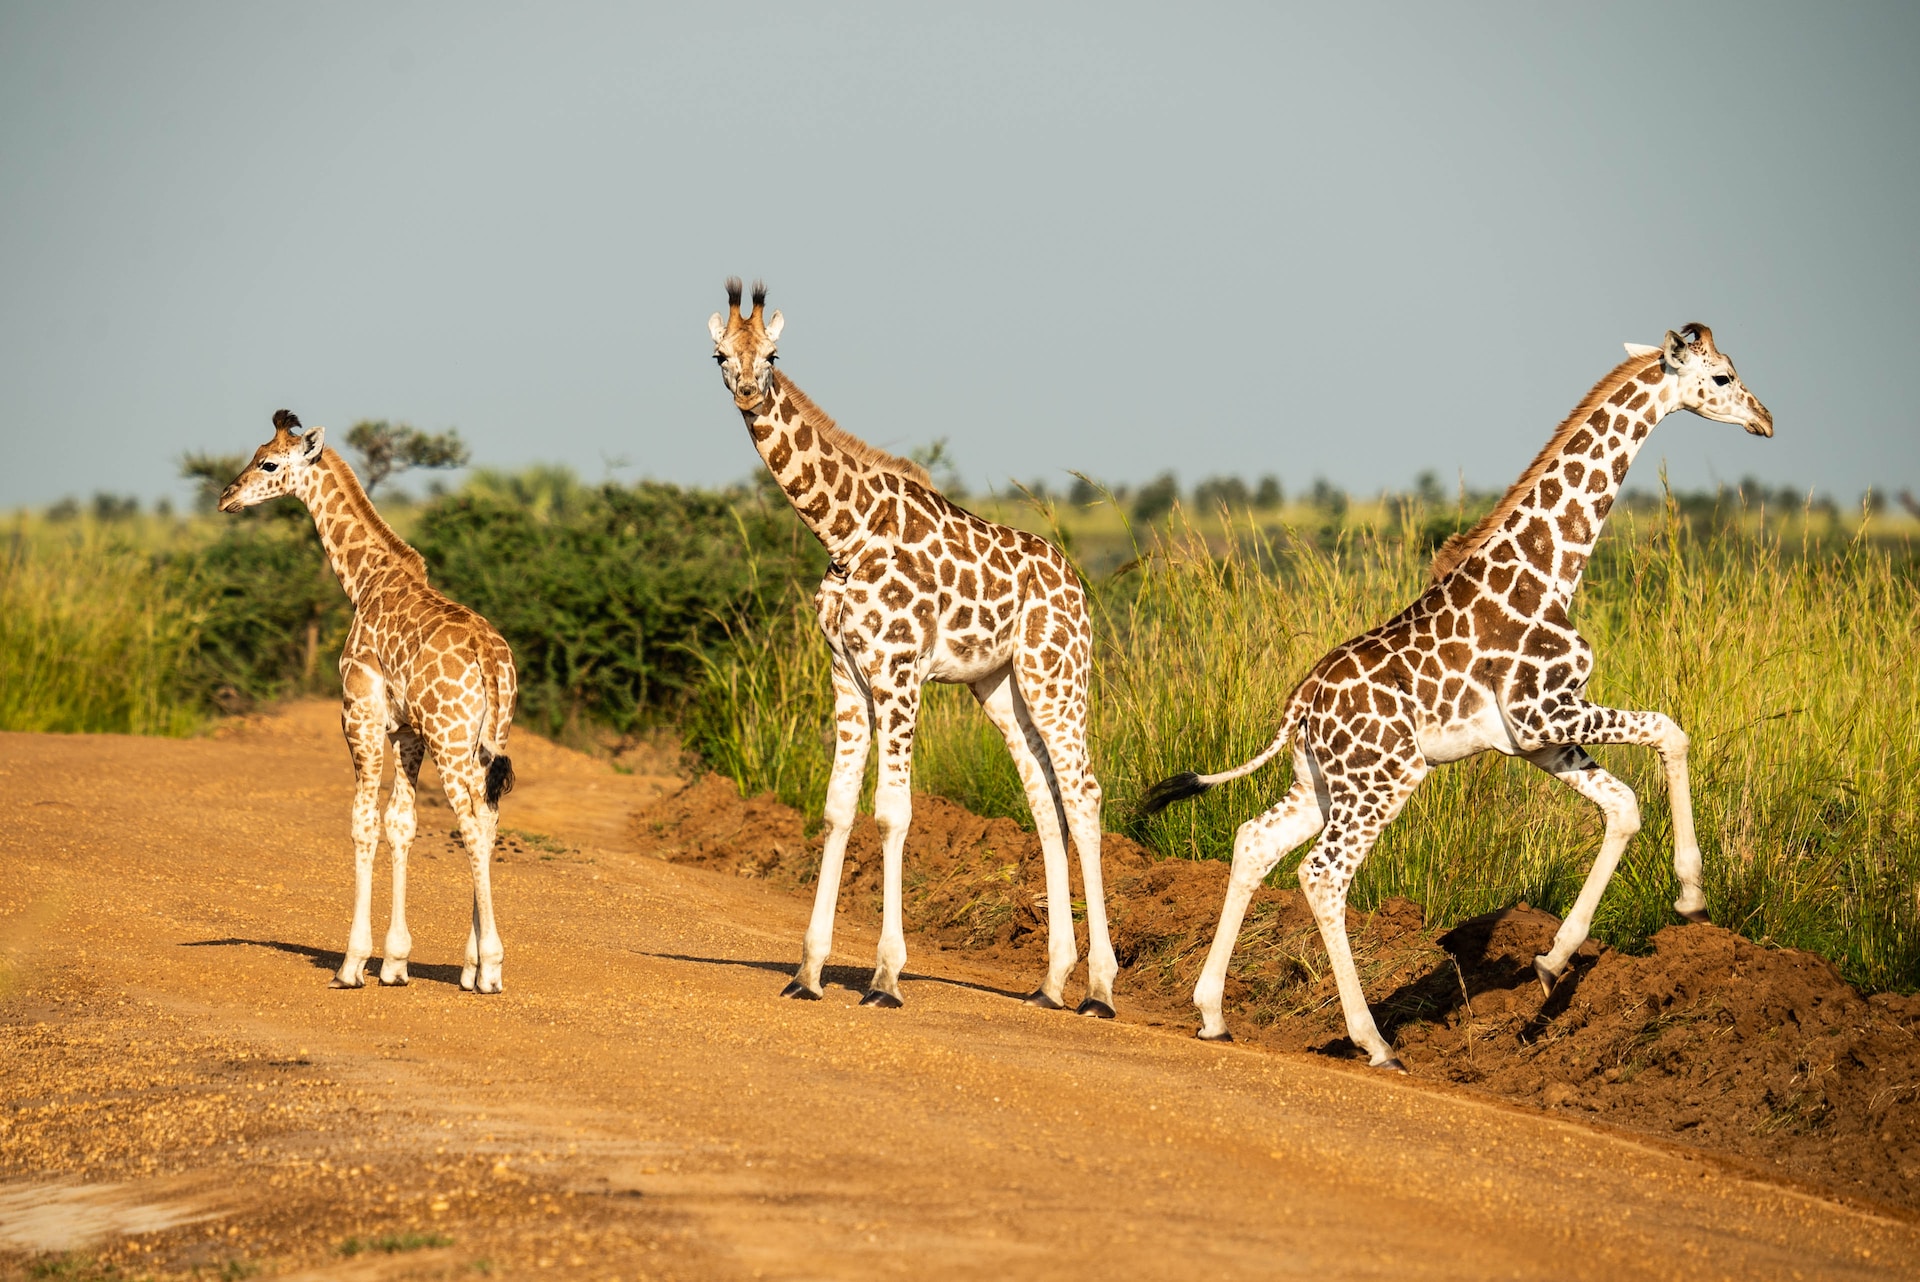
This highly targeted 6-day photographic itinerary takes you to Murchison Falls National Park, Uganda's premier destination for dramatic landscape and wildlife photography. The route perfectly balances vast savannahs, thundering waterfalls, and riverine birdlife to ensure optimal lighting and unique compositional opportunities.
Tour highlights for 6 Days Uganda safari
Rhinos tracked on foot
Vast savannah landscapes
Lions spotting morning
Nile river cruise
Murchison falls thunder
Golden hour wildlife
Powerful gorge hike
Rainforest chimpanzee tracking
Bigodi bird watching
Equator monument crossing
Day by day 6 Days Uganda safari
Day 1: Entebbe/Kampala to Murchison Falls
Your 6 Days Uganda safari kicks off with an early morning departure from Kampala or Bunamwaya. Leaving the bustling capital behind, you will journey northwest through dynamic landscapes. Your first major highlight is a stopover at the Ziwa Rhino Sanctuary. Here, you will experience the thrill of tracking endangered southern white rhinos on foot alongside expert rangers, offering incredible close-up opportunities. Afterward, the journey continues toward Uganda’s largest protected area, Murchison Falls National Park. As you descend the Albertine Rift Valley escarpment, the scenery transforms dramatically into vast, rolling savannahs. Your camera focus for the afternoon centers on capturing these breathtaking, wide-angle vistas. The sweeping panoramic views of the distant horizons and the winding path of the Nile River below provide a perfect introduction to the wild African wilderness. You will arrive at your lodge just in time to relax, unpack, and watch the sun dip below the beautiful northern savannah horizon.
Day 2: The Delta Boat Cruise & Savannah Game Drives
Day two of your 6 Days Uganda safari focuses on the diverse habitats of the iconic Nile River. You will start with an early morning game drive through the Buligi area, a prime territory for spotting predators like lions and leopards alongside massive herds of giraffes, elephants, and buffaloes. Your camera will stay busy capturing fast-paced action shots and classic wildlife portraits against the soft morning light. In the afternoon, the perspective shifts completely as you board a private, customized boat cruise sailing toward the delta area. From the water, you can capture spectacular low-angle photography of massive Nile crocodiles basking on the banks, pods of hippos, and unique water birds. The cruise leads you to the base of Murchison Falls, where the river thunders down with immense power. Framing the rushing waterfall against the dramatic river canyon creates unforgettable images, blending raw power with the stunning beauty of Uganda’s aquatic life.
Day 3: Sunrise Shoot & Hike to the Top of the Falls
The third morning of your 6 Days Uganda safari begins before dawn to make the most of the golden hour. Watching the sun rise over the open savannah plains offers a magical lighting environment for backlit wildlife portraits and misty landscape shots. After this rewarding morning session, you will head toward the river for an entirely different sensory experience: a hike to the "Top of the Falls." Standing at the crest, you will watch the mighty Nile River forcefully squeeze its massive volume through a remarkably narrow 7-meter gorge. The sheer acoustic volume and physical energy of the water are staggering. Photographically, this is the perfect time to utilize high-speed shutter captures to freeze the crashing water spray and the dramatic rainbows formed by the mist. The sheer force of nature creates endless opportunities for dynamic, high-contrast black-and-white compositions or vibrant color landscape panoramas before heading back to your lodge.
Day 4: Transfer to Kibale National Park
On day four, your 6 Days Uganda safari takes a scenic route southwest from Murchison Falls to the lush ecosystems of Kibale National Park. This transition day is highly visual, guiding you through rural Ugandan landscapes, vibrant local villages, and endless rolling hills carpeted with emerald-green tea plantations. The shifting terrain provides wonderful chances for environmental portraiture and street photography during brief roadside stretches. As you approach the Fort Portal area, the dramatic, jagged ridges of the Rwenzori Mountain foothills create a stunning backdrop in the distance. Upon entering the edges of Kibale’s ancient rainforest, your photographic focus shifts downward and inward. You will explore macro photography, capturing the intricate details of tropical butterflies puddling near forest streams and colorful forest-edge birds. The day concludes as you settle into your forest lodge, surrounded by the incredible evening chorus of tree frogs and distant nocturnal primates.
Day 5: Chimpanzee Tracking & Bigodi Wetland Sanctuary
The definitive highlight of your 6 Days Uganda safari arrives with an early morning chimpanzee tracking adventure deep within Kibale Forest. Walking beneath the ancient canopy, you will immerse yourself in a moody, atmospheric world of filtered green light. Once you locate a community, you will use fast lenses to capture expressive, intimate primate portraits amidst the dense foliage. The afternoon transitions to the community-run Bigodi Wetland Sanctuary for a guided swamp walk. This rich eco-route is a paradise for birders and wildlife photographers alike. You will have excellent opportunities to photograph the iconic Great Blue Turaco, various monkey species like the red colobus, and unique wetland vegetation. The softer, dappled forest light requires careful management of your camera's exposure, but it rewards you with deep, richly saturated colors and storytelling images that beautifully illustrate the vibrant diversity of this unique, pristine tropical ecosystem.
Day 6: Departure & Return to Kampala
The final day of your 6 Days Uganda safari offers a gentle conclusion to an unforgettable wildlife journey. You can opt for a quiet forest walk to capture the early morning mist rising from the trees or simply enjoy a relaxed breakfast at your lodge listening to the birds. Packing up your gear, you will begin the drive back toward Kampala or Entebbe International Airport. The return journey serves as a final opportunity for en-route cultural photography and sweeping landscape shots of the passing countryside. A traditional stop at the Equator monument allows for classic, fun memory photos to mark your journey across both hemispheres. You will arrive back in the capital city or at the airport by late afternoon, carrying thousands of beautifully composed images that capture the incredible wildlife, dramatic landscapes, and warm hospitality that define the unparalleled spirit of a classic Ugandan journey.
1. What are the essential lens choices needed to cover both expansive savannahs and dense rainforests?
A successful photographic safari across changing biomes demands a highly strategic, two-pronged lens kit. For the wide northern savannahs of Murchison Falls, a super-telephoto zoom lens (such as a 100–400mm or 200–600mm) is your absolute workhorse. This range gives you the reach to compress distant landscapes, isolate predators like lions on the Buligi circuit, and frame skittish birds along the Nile River delta without encroaching on their space. You will also want a wide-angle zoom lens (like a 16–35mm or 24–70mm) to capture the staggering scale of the Rift Valley escarpment and the physical drama at the Top of the Falls.
When you transition into the dense primary rainforest of Kibale National Park, the optical requirements change entirely. Under the thick forest canopy, light drops by up to eighty percent, rendering slow variable-aperture lenses largely ineffective. Here, speed is everything. A fast telephoto zoom lens, specifically a 70–200mm f/2.8, becomes the gold standard. The wide f/2.8 aperture allows maximum light to strike your sensor and creates a shallow depth of field that beautifully separates chimps from the messy background of tangled vines.
A 300mm f/2.8 prime lens is a brilliant luxury choice if your budget allows, offering pristine sharpness for distant canopy shots. Additionally, pack a dedicated macro lens (90mm to 105mm) for the afternoon walk in Bigodi Wetland Sanctuary. The wetland edge is alive with colorful forest butterflies, hyper-detailed tree frogs, and unique orchid species that require close-up capabilities to truly appreciate. Bringing these distinct focal lengths ensures you are never under-gunned, whether framing a giant elephant herd under a blazing sun or tracking a fast primate in deep jungle shadows.
2. How should camera exposure settings change when transitioning from savannah to jungle canopy?
Managing exposure between Murchison Falls and Kibale Forest is a study in contrasting light. Out on the open plains of Murchison Falls, light is abundant but harsh outside the golden hours. Your primary goal is controlling the high dynamic range and preventing blown-out highlights on pale grasses or animal coats. You will generally shoot in Aperture Priority or Manual mode at lower ISOs (100 to 400), using moderate to tight apertures (f/5.6 to f/8) to optimize lens sharpness and ensure structural detail remains crisp across the animal's body.
The moment you step beneath the multi-layered rainforest canopy of Kibale, those settings must be completely rewritten. Since flash photography is strictly prohibited to protect the well-being of the primates, you must rely entirely on ambient light. The most effective technical framework for chimp tracking is pairing Manual Mode with Auto ISO. By using this configuration, you can lock in a fast shutter speed (minimum 1/1000s) to freeze erratic primate movements and choose a wide aperture (f/2.8 or f/4) to draw in light, while allowing the camera to dynamically adjust the ISO as the chimps move through dappled sunlight and deep shadows.
Do not fear high noise levels; modern full-frame sensors handle ISO 3200 to 6400 incredibly well, and a sharp, grainy image can easily be saved in post-processing, whereas an image with motion blur is permanently ruined. Additionally, utilize spot metering directed at the chimpanzees' dark fur. Evaluative metering will often get tricked by bright pockets of sky breaking through the leaves, resulting in an underexposed, silhouette-like subject with completely lost facial expressions and eye details.
3. What specific support gear is best for stabilizing heavy glass inside a safari vehicle versus a forest trek?
Camera stabilization must be tailored directly to the physical constraints of each environment on this itinerary. Inside the customized 4x4 safari vehicles used during the Murchison Falls game drives, a traditional tripod is bulky, slow to deploy, and potentially dangerous if the vehicle shifts suddenly. Instead, the ultimate stabilization tool is a heavy-duty safari beanbag rested along the window sill or open roof hatch. A beanbag dampens engine vibrations beautifully and allows you to quickly track moving predators smoothly.
For the boat cruise down the Nile River toward the delta, a lightweight monopod or a specialized gimbal head clamped directly to the boat rail offers excellent structural support. It removes the physical weight of a long lens during extended waiting periods for crocodiles or hippos, while providing swift vertical and horizontal panning mobility on a moving water platform.
Once you arrive at Kibale National Park for chimpanzee tracking, your stabilization strategy changes to prioritize mobility. A tripod is a major liability on a forest trek; it catches on thick vines, slows your pace when tracking fast-moving primate troops through the brush, and can cause trips on uneven root systems. A sturdy, carbon-fiber monopod is a reasonable middle ground, but many professional forest photographers prefer shooting entirely handheld. To make handheld shooting viable in the dark forest understory, make sure to activate your lens and camera body image stabilization systems (IBIS). This physical freedom allows you to instantly drop to a low angle or tilt directly upward into the high canopy when a chimpanzee leaps across the branches.
4. How can a photographer protect sensitive digital equipment from fine savannah dust and jungle humidity?
Uganda’s environments present two distinct, aggressive threats to high-end camera equipment: fine abrasive grit and extreme moisture. The northern savannah sector of Murchison Falls is notorious for its fine, powdery red dust, which kicks up in large clouds behind safari vehicles. If this grit settles on your lens barrels or enters the camera body, it can jam internal focus gears and permanently scratch sensor glass. To prevent this, never change lenses inside an open safari vehicle.
The ideal preventative setup is carrying two separate camera bodies: keep one permanently paired with your super-telephoto lens and the other attached to a mid-range zoom. When the vehicle is moving, wrap your active camera systems in padded wrap or dedicated dust covers, keeping them sealed inside a high-quality, zippered camera bag until the vehicle stops and the dust settles. Keep a blower bulb and fine microfiber cloths in an easily accessible pocket to clear the front element after every shooting sequence.
When you transition southwest to Kibale National Park, the threat flips from dry dust to high humidity and sudden tropical downpours. The rainforest environment can cause rapid condensation inside lens elements when moving from an air-conditioned safari vehicle into the warm, damp forest air. To combat this, place sealed silica gel packets inside your camera bags to draw out trapped moisture. Always pack form-fitting, waterproof rain sleeves for your camera bodies and long lenses. A rain cover allows you to keep shooting safely through a sudden jungle downpour, capturing unique atmospheric images of wet foliage and rain-soaked primates that casual travelers miss entirely.
5. What are the best camera techniques for capturing the raw power of Murchison Falls at the top of the gorge?
Photographing the Nile River as it violently compresses into a narrow seven-meter fissure at the Top of the Falls requires two completely opposing creative approaches to shutter speed. To emphasize the violent, concussive energy of the water, you want to use a high-speed shutter approach. Setting your shutter to 1/2000s or faster freezes the individual exploding droplets, highlighting the chaotic texture of the water spray and the immense physical force of the river. Pair this speed with a mid-range aperture to maintain deep structural sharpness throughout the canyon walls.
The alternative artistic choice is to create a long-exposure shot that transforms the churning white water into a smooth, ethereal silk ribbon, contrasting beautifully against the dark, rugged rocks of the gorge. To achieve this during daytime hours, a sturdy tripod is absolutely non-negotiable to prevent camera shake. You will also need a high-quality Neutral Density (ND) filter—such as a 6-stop or 10-stop filter—to drastically cut down the incoming light, allowing you to extend your shutter speed to several seconds without overexposing the frame.
Regardless of your stylistic choice, the perpetual mist at the top of the falls creates a challenging shooting environment. The air is thick with a heavy, localized spray that can cover your front lens element within seconds, causing soft, blurry patches in your photos. To manage this, keep your lens hood attached at all times to block angled spray, keep your lens cap on until the exact second you are ready to shoot, and use a dry microfiber cloth to wipe the front glass between exposures.
6. How do you photograph dark-furred primates effectively against bright, backlit forest backgrounds?
Capturing crisp detail on a chimpanzee's dark coat when they are positioned high in the rainforest canopy is one of the toughest challenges in wildlife photography. If you rely on your camera’s automatic metering system, the bright sky filtering through the leaves will dominate the exposure calculation. The camera will naturally try to tone down the bright background, leaving your primary subject completely underexposed—resulting in a flat silhouette with no visible facial features, texture, or eyes.
To capture these tricky shots successfully, switch your camera's metering mode to Spot Metering and place the center focus point directly on the chimpanzee's face or chest. This tells the camera to calculate the exposure exclusively from the dark fur, completely ignoring the bright sky behind it. While this approach will likely overexpose or "blow out" the background leaves into bright white, it ensures that the primate’s expressions, wrinkled skin, and deep eye details are perfectly exposed and highly visible.
Another highly effective approach is utilizing your camera's Exposure Compensation feature when shooting in semi-manual modes. Dialing in a positive compensation value of +1.0 to +2.0 stops manually forces the camera to overexpose the scene, bringing vital light back into the dark fur. Always shoot these forest encounters in a compressed RAW format. RAW files retain immense amounts of shadow data, giving you the digital flexibility during post-processing to safely lift shadows and apply selective noise reduction, turning a challenging backlit encounter into an elegant, clear portrait.
7. What composition strategies help separate wildlife from busy savannah brush or chaotic jungle backgrounds?
Isolating a wild subject from distracting natural elements is vital for creating clean, impactful images that immediately draw the viewer’s eye. On the open savannah of Murchison Falls, animals like lions or leopards are frequently nestled deep within tall, golden grass or thorny thickets. To minimize these background distractions, position your camera at the lowest possible vantage point. Shooting from eye-level or slightly below—by leaning low out of the safari vehicle window—creates an intimate perspective, making the animal look monumental while naturally dropping the background farther behind them.
In the chaotic primary forest of Kibale, the visual clutter multiplies with an overwhelming network of crisscrossing branches, dangling vines, and dense green leaves. To create a clean composition here, lean heavily on a shallow depth of field. Shooting with a fast telephoto lens wide open at f/2.8 or f/4 creates a razor-thin plane of focus. This optical technique turns the foreground and background foliage into a smooth, painterly blur, effectively sandwiching your sharply focused subject between clean layers of soft color.
Pay close attention to composition framing as well. Look for natural openings in the vegetation to use as a organic frame around the animal, using nearby leaves to guide the viewer's eye straight toward the subject. Always focus explicitly on the animal's eye closest to the camera. If a twig or leaf cuts directly across the subject's face or eyes, patiently hold your position; wildlife constantly shifts its weight, and a tiny two-inch movement can suddenly open up a perfectly clean, unobstructed line of sight.
8. What is the optimal workflow for managing and backing up large volumes of RAW files while in remote lodges?
A dedicated multi-day photo safari generates a staggering volume of data, especially when shooting high-frame-rate bursts of fast-moving wildlife. To safeguard your work against card corruption or equipment loss, establish a strict, disciplined nightly backup routine at your safari lodges. Never wait until you get home to manage your data. Begin by investing in a fast, rugged, and bus-powered portable Solid State Drive (SSD), along with a lightweight travel laptop to manage file transfers smoothly.
Your backup workflow should follow the classic 3-2-1 backup strategy modified for travel conditions. Every evening, transfer your day's RAW files from your camera cards onto your laptop's internal drive, and immediately duplicate that folder onto your external portable SSD. This means your images exist in three distinct physical locations simultaneously: the original memory card, the laptop, and the external drive. To maintain maximum security, keep the external SSD in a separate bag from your laptop while traveling on the road between national parks.
Do not clear or format your camera’s memory cards until you have verified that the files are fully copied and readable on both backup drives. If your camera features dual card slots, configure the system to write images to both cards simultaneously in backup mode while shooting in the field. This gives you instant redundancy the moment you press the shutter, protecting your irreplaceable wildlife encounters against a sudden memory card failure during a critical shooting sequence.
9. How can a photographer capture compelling environmental portraits that tell a story beyond close-up headshots?
While tight, detailed wildlife headshots are undeniably beautiful, a portfolio filled exclusively with close-up faces can eventually feel repetitive and lack a sense of place. To elevate your storytelling, intentionally incorporate environmental portraits into your daily shooting routines. An environmental portrait pulls back the focal length to include a significant portion of the surrounding landscape, providing crucial context that reveals how the animal interacts with its native habitat.
When exploring the Buligi circuit in Murchison Falls, try swapping your long prime lens for a flexible 70–200mm zoom. Frame a lone Rothschild’s giraffe not as a tight portrait, but as a smaller element set against a massive, sweeping background of whistling thorn acacias and dramatic storm clouds rolling over the Albertine Rift. This wide composition immediately communicates the true scale, isolation, and majestic atmosphere of the African savannah. Use leading lines, such as the sweeping curves of the tracks or the natural flow of the Nile, to anchor the animal within the wider scene.
In Kibale Forest, apply this same wide philosophy by showing a chimpanzee sitting at the base of a massive, buttressed fig tree. Including the towering trunk and cascading lianas visually illustrates the ancient, vertical nature of their rainforest home. When shooting these wider frames, use a slightly tighter aperture like f/5.6 to ensure that both the subject and the vital environmental details retain crisp definition, allowing the viewer to explore the rich textures of the ecosystem.
10. What are the best times and locations on this itinerary for capturing dramatic silhouette and rim-lit images?
Creating high-contrast silhouette and rim-lit photography relies entirely on strong, directional backlight. The absolute best windows for these techniques are the first and last forty minutes of daylight on the open savannah of Murchison Falls. During the early morning game drive on Day 2 and the sunrise shoot on Day 3, the sun sits low on the horizon, casting a warm, horizontal light across the plains that is perfect for creative rim-lighting.
To capture a dramatic silhouette, position your safari vehicle so an animal—such as an elephant, an acacia-perched leopard, or a tall giraffe—is directly inline between your lens and the rising sun. Set your exposure based on the brightest part of the sky behind the animal. This intentionally forces the subject into a deep, dark shape, accentuating their recognizable outline against the vibrant morning sky. Look for animals positioned on ridge lines or termite mounds to ensure their silhouette stands out clearly against the open sky rather than blending into dark ground vegetation.
Rim lighting requires a slightly offset angle, where the sun sits just behind and to the side of the animal. This positions the light to catch the outer edges of the animal's silhouette, creating a glowing "halo" of light that beautifully defines the texture of a lion’s mane or the coarse hair along an elephant’s back. To maximize this striking effect, look for a dark, shaded hill or dense thicket to serve as the background behind the animal, making the brilliant rim-lit outline pop with dramatic contrast.
11. How do you handle the unique challenges of photographing wildlife from a moving boat on the Nile River?
Shooting wildlife from a boat platform introduces a complex mix of motion variables. Not only are your subjects—such as pods of hippos, swimming elephants, or birds—frequently in motion, but the boat itself is constantly drifting, vibrating from the engine, and rocking on the water currents. To counteract this multi-directional movement and guarantee sharp images, you must keep your shutter speed significantly higher than you would on dry land, aiming for a minimum speed of 1/1600s or faster.
To handle these fast-paced conditions smoothly, configure your camera to Continuous Autofocus (AF-C or AI Servo) and select a dynamic zone or tracking mode. If your camera supports animal eye-detection autofocus, turn it on; it will lock onto the eye of a crocodile or waterbird and hold focus even as the boat gently pitches on the waves. Keep your camera set to its highest continuous drive or burst mode to capture a rapid sequence of shots, increasing your chances of nailing the perfect alignment during an active movement.
Pay close attention to changing light angles as the boat winds along the river channels. A polarizing filter is an incredibly valuable accessory for this boat cruise, as it cuts down the harsh glare reflecting off the water’s surface and deepens the blue tones in the sky and foliage. Be careful with your physical support choices; never rest a long lens directly on the boat's hard metal rails while the motor is running, as the engine vibrations will travel straight through the hull into your lens, causing subtle micro-blur throughout your photos.
12. What focal points and compositions work best for macro photography in the Bigodi Wetland Sanctuary?
The afternoon walk through the Bigodi Wetland Sanctuary presents a wonderful stylistic shift, moving away from large mammals to focus on the intricate world of macro photography. The primary targets here are the dazzling arrays of tropical butterflies, colorful insects, and delicate forest orchids along the swamp paths. When working at macro scales, your depth of field shrinks to a fraction of an inch, making precise focus placement your single most important technical goal.
When photographing butterflies or insects, always align your camera's sensor plane perfectly parallel to the subject's wings or body. Because the depth of field is incredibly thin at high magnifications, even a slight tilt of the camera can cause the back wing or tail to fall completely out of focus. Always aim your primary focus point directly on the insect's eye. If the eye is tack-sharp, the viewer will naturally accept a soft, artistic blur across the rest of the body.
Because the light along the shaded wetland paths can be dim and uneven, you will often need to use a slightly tighter aperture—such as f/8 or f/11—to maintain enough depth of field to keep the entire insect sharp. To compensate for this narrow aperture without dropping your shutter speed, do not hesitate to lift your ISO. Look for clean, simple backgrounds, such as a single distant leaf, to ensure your macro subject stands out cleanly without getting visually lost in a chaotic mess of twigs and swamp grass.
13. How can a photographer ethically manage distances and animal behavior to secure natural, un-stressed shots?
Great wildlife photography should never come at the expense of an animal's well-being. When an animal feels crowded or threatened by human presence, its behavior changes from relaxed and natural to stressed and alert, resulting in tense, defensive postures that look unnatural on camera. Work closely with your safari guide to read subtle behavioral cues, such as pinned-back ears, sudden stops in feeding, or direct, unblinking stares, which indicate it is time to back the vehicle away.
Never ask your safari guide to drive off-track or push closer than park regulations allow just to get a tighter frame. If a predator or elephant herd is distant, embrace the opportunity to create a compelling environmental portrait, or use a teleconverter to extend your focal reach safely. When tracking chimpanzees in Kibale Forest, strictly adhere to the mandatory eight-meter safety boundary. Maintain a quiet, calm demeanor, avoid making direct eye contact with dominant males, and never use sudden, jerky movements that could startle the primates.
Flash photography is strictly banned on all primate tracks because a sudden burst of artificial light can temporarily blind and deeply terrify the animals. By respecting these boundaries and blending quietly into the background, the wildlife will eventually accept your presence and return to their normal routines. This patience rewards you with authentic storytelling images of genuine, unforced wild behaviors—such as natural grooming sessions, relaxed play, and peaceful rests.
14. What are the key technical differences between photographing a savannah lion versus a forest chimpanzee?
While both are iconic African subjects, photographing a lion on the open savannah of Murchison Falls and a chimpanzee in the dense rainforest of Kibale requires completely different technical and mental approaches. Savannah lion photography is heavily focused on managing distance, patience, and waiting for dramatic light angles. Because you shoot entirely from a vehicle, you have the luxury of using massive, heavy telephoto lenses supported by beanbags, working with clean lines of sight across the open plains.
Chimpanzee photography, by contrast, is a highly physical, fast-paced challenge on foot. You must carry all your gear through thick, humid jungle terrain, managing rapidly changing angles as the primates swing effortlessly through the high canopy or sprint across the forest floor. The light is constantly low and highly unpredictable, demanding immediate, manual adjustments to your exposure settings to keep up with the fast action under the trees.
The structural contrast of the subjects requires different composition techniques as well. A lion's neutral, tawny coat blends smoothly into the dry savannah grass, meaning you must lean on backlighting or a very shallow depth of field to separate them from the landscape. A chimpanzee's dark, coarse fur creates a heavy contrast against the vibrant green leaves of the forest, requiring spot metering to preserve facial details and careful management of highlights to avoid blowing out the bright background.
15. How should a photographer prepare their gear package for domestic flight weight restrictions in Uganda?
If your safari itinerary involves internal domestic flights between regional airfields—such as flying from Murchison Falls down to the Kasese or Kamwenge airstrips near Kibale—managing strict luggage weight limits is a critical logistical challenge. Local domestic carriers typically enforce a strict total baggage limit of fifteen kilograms (thirty-three pounds) per passenger, which must accommodate both your personal clothing and your heavy camera gear. Furthermore, these small bush planes require soft-sided bags to fit into their tight cargo holds.
To navigate these tight restrictions without leaving essential gear behind, invest in a premium, ultra-lightweight camera backpack that meets standard international carry-on dimensions. Prioritize packing your heavy glass, camera bodies, and essential laptop or backup drives inside this carry-on pack, as pilots are usually more accommodating with compact backpacks that can slide under your seat or fit in the small cabin spaces. Wear your heaviest travel clothes, hiking boots, and a multi-pocket photography vest on the plane, filling the pockets with heavy accessories like batteries, chargers, and filters.
For your checked luggage, use a rugged, weather-resistant soft duffel bag to hold your clothing, toiletries, and non-fragile support gear like beanbags, monopods, and rain covers. Consider building a versatile, streamlined gear kit centered around high-quality zoom lenses rather than multiple heavy prime lenses. For instance, pairing a 24–70mm f/2.8 lens with a 100–400mm zoom provides comprehensive coverage from wide landscapes to distant wildlife, keeping your total gear footprint exceptionally light and mobile.
Booking 6 Days Uganda safari with us Roads of Adventure safaris
Booking your 6-day safari with Roads of Adventure Safaris Roads of Adventure Safaris provides a fully tailored experience 6 Days Uganda wildlife safari and Uganda birding safari combo tour. Their packages cover all your transportation, permits, and lodge bookings so you can focus on Uganda's spectacular wildlife and natural beauty